

How to Install a Manual Sliding Cold Storage Door on an Existing Walk-in Cooler
2026-07-06
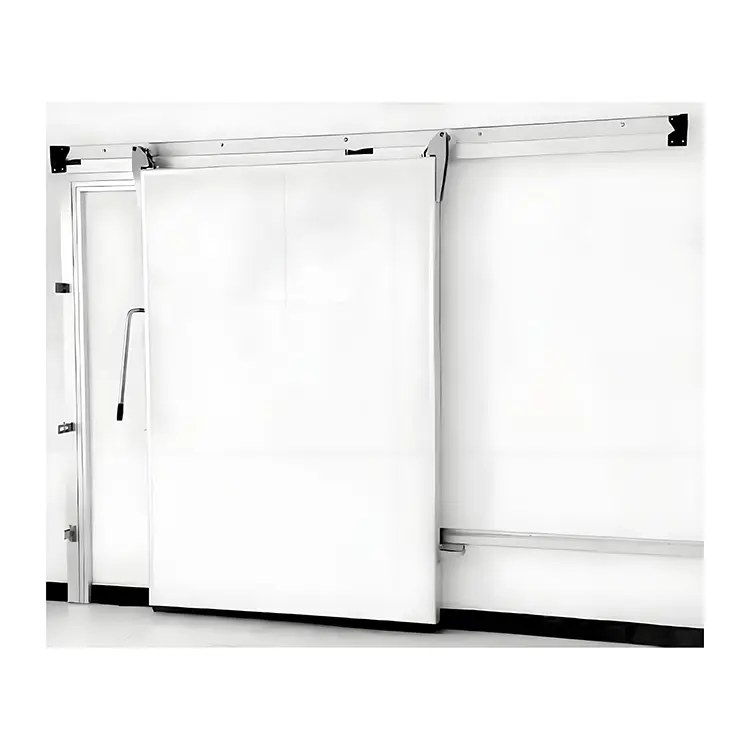
Installing a Manual Sliding Cold Storage Door on an existing walk-in cooler is not a casual DIY project—it is a precision task that directly impacts energy efficiency, product safety, and operational uptime. Unlike hinged alternatives, a properly fitted Manual Sliding Cold Storage Door saves floor space and maintains a consistent thermal envelope. However, retrofitting one onto an older cooler demands careful measurement, structural assessment, and methodical execution. Drawing from field-tested practices, this guide walks you through every critical stage, while highlighting why HANYORK engineered solutions consistently outperform generic retrofits.
Pre-Installation Assessment (Do Not Skip This)
Before ordering your Manual Sliding Cold Storage Door, verify these four structural conditions. Failure here guarantees air leakage and premature track failure.
| Assessment Item | Tool Required | Acceptable Range | Red Flag (Stop Here) |
|---|---|---|---|
| Wall opening squareness | Laser level & tape measure | Diagonal variance ≤ 5mm | Variance > 10mm |
| Wall thickness (insulated panel) | Core drill or panel spec sheet | 75mm – 200mm | < 75mm (insufficient anchorage) |
| Header load-bearing capacity | Structural gauge | ≥ 150 kg static load | Cracking, rust, or previous repairs |
| Floor levelness inside/outside | 2m spirit level | Slope ≤ 2° toward outside | Reverse slope (water pools inside) |
If your existing opening fails any red-flag condition, HANYORK offers custom shim kits and header reinforcement brackets specifically designed for retrofit scenarios.
Step-by-Step Installation Procedure
Step 1: Secure the Opening and Remove Existing Door
Fully empty the cooler's front zone (at least 1.5m clearance). Disconnect any power to nearby evaporators. Remove the old hinged or sliding door assembly, but keep the existing hinge brackets—they often serve as reference points for the new track height. Clean the panel edges with isopropyl alcohol to remove grease; this ensures the new Manual Sliding Cold Storage Door gasket seats perfectly against the panel face.
Step 2: Assemble the Track and Header System
Lay out the track components on a clean floor. Most kits, including HANYORK’s retrofit series, include a pre-drilled stainless steel track, nylon rollers, and a galvanized header plate. Critical rule: The track must be perfectly horizontal—even a 2mm drop over 2 meters will cause the door to drift and stress the bottom guide. Use a laser level and shim the header plate in 0.5mm increments until dead level.
Step 3: Mount the Track and Install Roller Carriers
Bolt the header plate to the wall using expansion anchors (M10 or larger, torque to 40 Nm). Hang the roller carriers onto the track, then attach the door panel's top brackets. For heavy panels (≥80 kg), HANYORK recommends a two-person lift with suction cups—never pry against the foam core. Slide the door gently to both extremes; it should move with ≤ 5 N of push force. If it binds, loosen the carrier bolts and re-align the track.
Step 4: Install Bottom Guide and Floor Strike
The bottom guide is often overlooked but dictates long-term alignment. Mark the floor centerline from the track's midpoint. Drill and anchor the floor guide (usually a U-channel or pin type). For walk-in coolers with heated floors, use HANYORK’s insulated floor bracket to prevent cold bridging. Test the door sweep—it must overlap the threshold by at least 15mm without scraping.
Step 5: Gasket Sealing and Final Tension Adjustment
Install the perimeter gasket (EPDM or silicone) into the door's rebate. Adjust the roller eccentric nuts to compress the gasket evenly—aim for a 3–5mm visible squeeze when closed. Perform a flashlight test: close the Manual Sliding Cold Storage Door, turn off the interior light, and shine a bright light from outside. Any visible light means air infiltration—re-tension the top rollers until the gap disappears.
Post-Installation Performance Checklist
| Test | Procedure | Pass Criterion |
|---|---|---|
| Sliding force | Spring scale at handle | ≤ 25 N (steady, no jerking) |
| Gasket compression | Paper strip test (pull resistance) | Even resistance along full perimeter |
| Thermal bridge check | Infrared thermometer on header | Header temp ≤ ambient + 2°C |
| Self-closing (if equipped) | Open 60°, release | Closes fully within 5 seconds |
Frequently Asked Questions About Manual Sliding Cold Storage Doors
Q1: How do I know if my existing wall opening is compatible with a Manual Sliding Cold Storage Door without modifying the cooler structure?
A: Measure the opening's width, height, and diagonal squares. A compatible opening must have a width tolerance of ±10mm and height tolerance of ±5mm relative to the door's nominal size. The wall thickness must be between 75mm and 200mm to anchor the header brackets securely. If your wall is thinner, HANYORK offers a structural backer plate that distributes the load across 4× the surface area, eliminating the need for wall replacement. Also, verify the header has at least 150mm of clear vertical space above the opening for the track assembly—if not, you may need a low-profile track kit. Always perform a hammer-tap test on the anchor zones; a hollow sound indicates delaminated foam, which requires injection-fixing resin before installation.
Q2: What is the most common mistake that reduces the lifespan of a Manual Sliding Cold Storage Door after installation?
A: The number one error is over-tightening the roller eccentric nuts to "force" a better seal. This creates excessive point-loading on the nylon wheels, leading to flat-spotting within 3–6 months. The correct method is to tighten each eccentric nut equally (¼ turn at a time) and re-check gasket compression using the paper-strip method—not by visual squeeze alone. Second most common: failing to lubricate the track with food-grade silicone spray every 90 days. Third: installing the floor guide off-center; even a 3mm offset causes the bottom bracket to grind against the guide, wearing out the stainless steel insert. HANYORK provides a laser-centering tool with every door kit specifically to eliminate this error.
Q3: Can I install a Manual Sliding Cold Storage Door on a cooler that has an uneven floor or a floor drain crossing the threshold?
A: Yes, but you must use an adjustable bottom guide with a vertical float of ±15mm. Standard fixed guides will bind on uneven surfaces. For floor drains, install a bridge plate—a 2mm thick stainless steel ramp that bridges the drain channel without interfering with the door sweep. The bridge must be bolted, not glued, to allow cleaning access. Additionally, set the bottom sweep with a 5mm clearance above the highest floor point, then use a spring-loaded drop-seal that makes contact only when the door is fully closed. HANYORK offers a specific "Drain-Friendly" retrofit kit that includes a sloped bridge and a self-adjusting sweep, tested in cold storage facilities with daily wash-down cycles.
Maintenance Schedule (First 12 Months)
-
Month 1 – Re-torque all header anchors (thermal cycling loosens initial grip).
-
Month 3 – Clean track debris; apply HANYORK-approved silicone lubricant.
-
Month 6 – Check gasket compression (re-adjust if paper strip pulls too easily).
-
Month 12 – Full inspection: roller bearings, bottom guide wear, and seal integrity.
Why Choose HANYORK for Your Retrofit?
Generic doors often require custom machining on-site—costly and risky. HANYORK pre-engineers each Manual Sliding Cold Storage Door with adjustable roller brackets, multi-position floor guides, and a patented gasket compression system that adapts to wall irregularities up to 8mm. Every unit ships with a color-coded installation template, reducing installation time by 40% compared to standard kits. More importantly, HANYORK doors are tested to 50,000 open-close cycles at -25°C, ensuring your walk-in cooler stays within HACCP temperature zones without unplanned downtime.
Ready to Retrofit? Contact Us for a Site-Specific Plan
Every walk-in cooler has its own quirks—age, panel material, floor condition, and daily traffic patterns. A generic guide can only take you so far. HANYORK provides free virtual site assessments: send us your opening dimensions, photos of the header and floor, and your current temperature setpoint. Our application engineers will respond within 24 hours with a tailored Manual Sliding Cold Storage Door proposal, including anchor maps and torque specifications for your specific panel type. Contact HANYORK today via our website or call your regional distributor to schedule a consultation—because a cold storage door that fits right, works right, and stays right is not a luxury; it is a business necessity.